
Anybody need a fall centerpiece for their table? Or how about a accent on your coffee table? Well I have the perfect EASY project!

It only spent 7 dollars and a couple hours! Get ready, get excited here we go!
Find 3 different size cans around your house. Notice I trimmed my Pringles can a bit so they fit a little better together.

Next I took my boys to the park and we collected sticks! We had a great afternoon together and I got what I needed for my project! It worked out great!
When you get back get 2 sheets of brown construction paper, your trusty hot glue gun and some double sided tape.

Cover the can with the construction paper so you don't see the can under the sticks. Then apply the hot glue to your stick and stick it on.

Every now and then I would get a space between my sticks.

So I just took another stick and glued it over the whole. It fills it in and gives the vase a more dimensional look!

This was the longest part of the project and I did it while I watched tv!
You can see the vases still have lots of extra long sticks. Take some clippers and trim those edges off!

I didn't trim the top right down to the top of the can I left a about a 1/4" so that you couldn't see the can at all!

To finish off the vase I added some papered wire. You could use rafia, or ribbon, whatever you have! I did 3 looks around the top and bottom! I think it looks cute and it helps the sticks to stay in place!

TADA! It looks so great! (not to toot my own horn:)


The flowers...
I bought my flowers at the local Dollar Tree!
I usually DO NOT recommended buying flowers there but because this arrangement is so tightly bunched together its ok to have a lower quality flower!
I bought 3 long yellow orchids, 1 bunch red mum 1 bunch red sun flower, 1 bunch orange mum and 1 bunch yellow mum.

I put the yellow orchids in my tallest vase.
We are not going to trim these flowers down. Just spread out each stem to give them some more body.

Put one stem in.
*This is important.*
With your next 2 stems put them in at an angle. This will help with the stability of your arrangement.
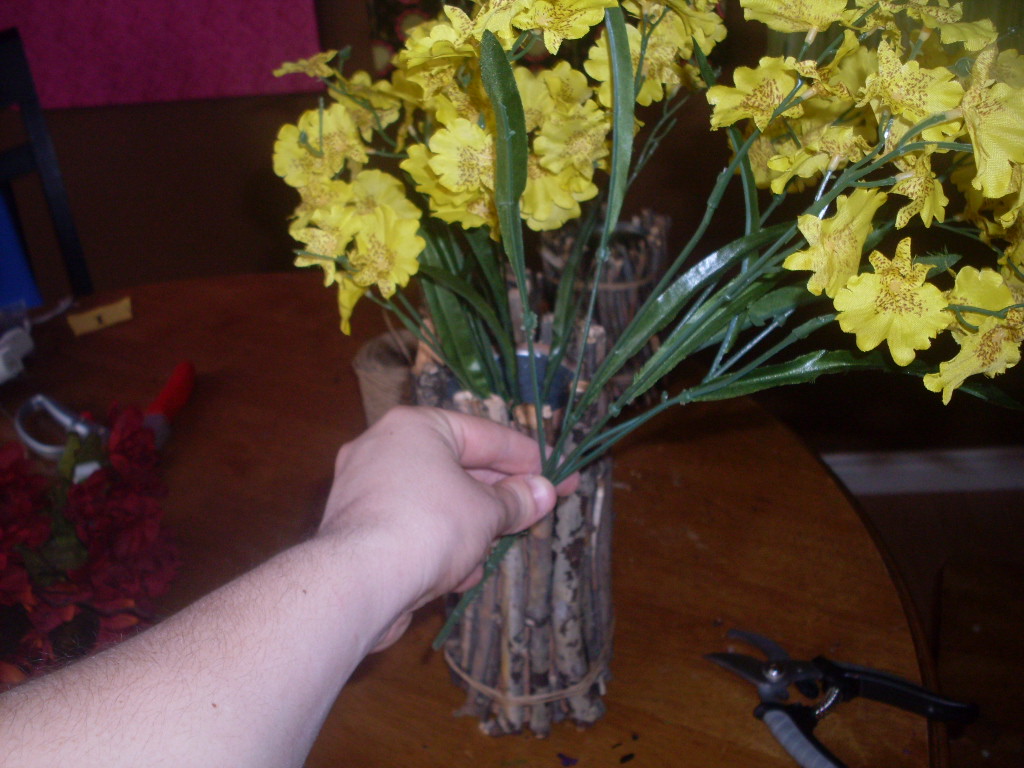
Spin the vase and add your last stem in the top. Now you can adjust individual stems to fill in wholes.

I put the red flowers in my smallest vase.
Trim these down. Clip them all off the chunky stem and them line them up. Before putting each stem in line it up next to the vase and clip it the the length it will look best in the vase. Start the same way you did with the previous vase. Put your first 3 flower in then start adding other flowers on an angle.

The angle creates a grid so you can add flowers just where you want them and they wont flop around.

I like to group like flowers. Because I only have 4 sunflowers I chose to group them in 2's. It adds a more modern flare then just dotting them around your arrangement.

Fill in until you have your small circular top.
Our last vase is the mixed orange and yellow. These 2 colors went well together so I thought I would have one vase mixed.
Clip all the ends and you are ready to get started.

Hold up the flower to the vase, along the edge of a table works best. Then clip it off at the height you want your flower once its in the vase.

Add 3 then start putting them in on an angle!

Now you can start adding them just where you want them because your grid is strong enough.

Try grouping the yellow flowers in groups of 2 or 3 so that you have a more clean and modern look.

As you finish up fill in along the bottom so you dont have a line edge.


No comments:
Post a Comment